

We have the most talented editors, with tens of years of experience in editing, people that are passionate about cropping, retouching, changing and enhancing photos. Photo editing is taken to the level of art today, and we like to consider ourselves artists. Why would you bother learning complicated programs for editing, as long as you can ask the professionals to help you? z™ is your one shop stop for any service related with retouching! Customizable packages, good communication, attention to details and dedication in work is what can you expect from us!
Grows Business is a professional Web services company. We provide outsourced software development services to over 50 active clients from 21 countries.
Looking for photo editing services which are both timely and affordable? If you are then you are in the right place. With more than a decade of experience we are providing services to customers that are completely professional as well as economical.
 Before
 After
After
 Before
 After
After
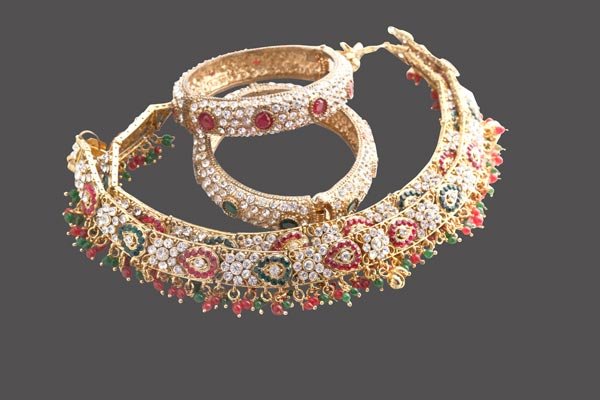
 Before
 Before
 After
After
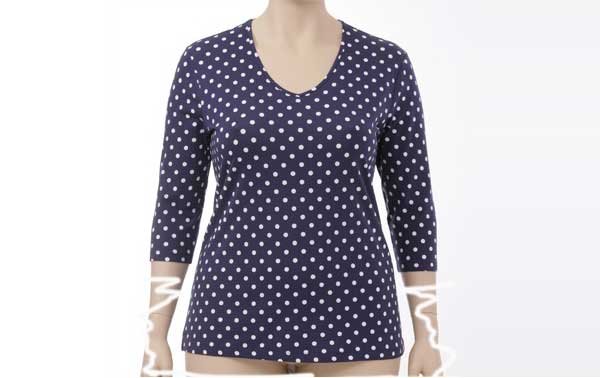
 Before
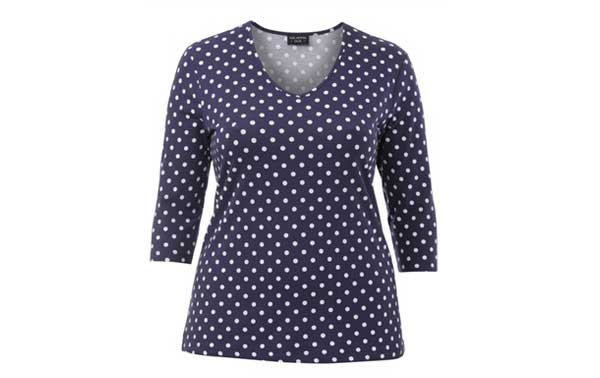
 After
After
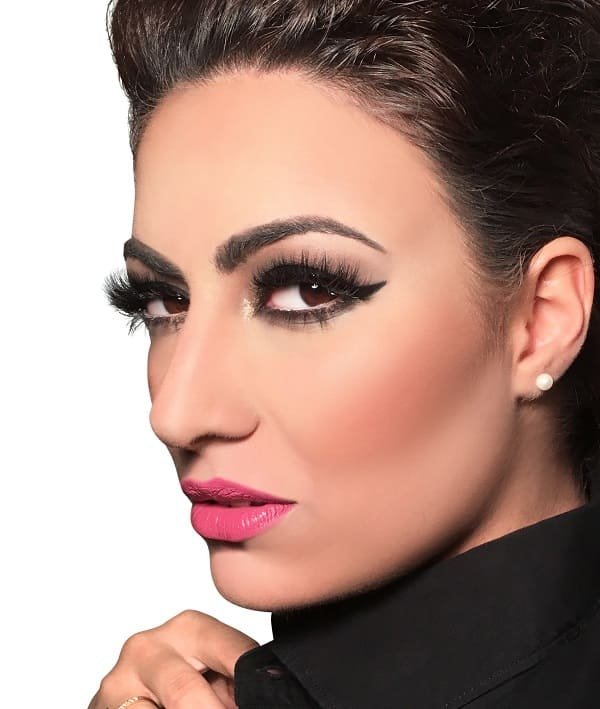
 Before
 After
After
 Before
 After
After
 Before
After
Before
After
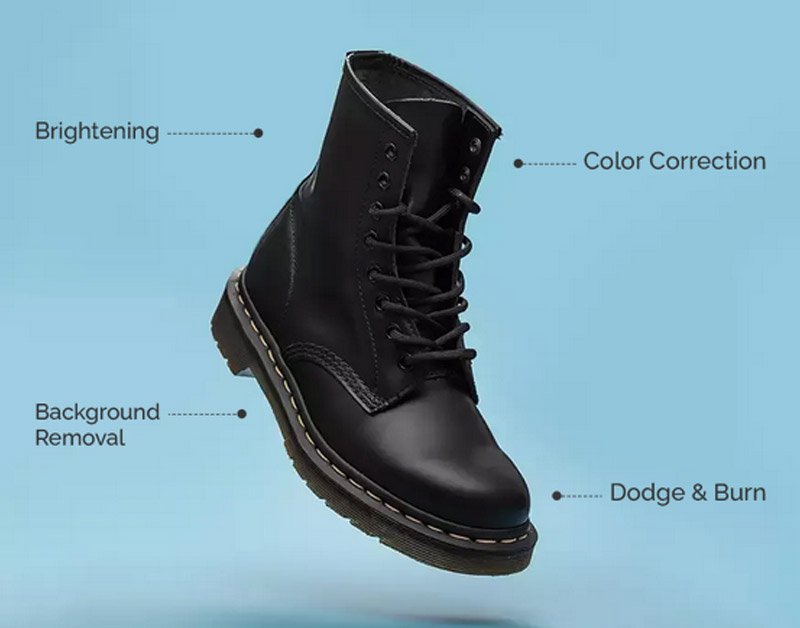
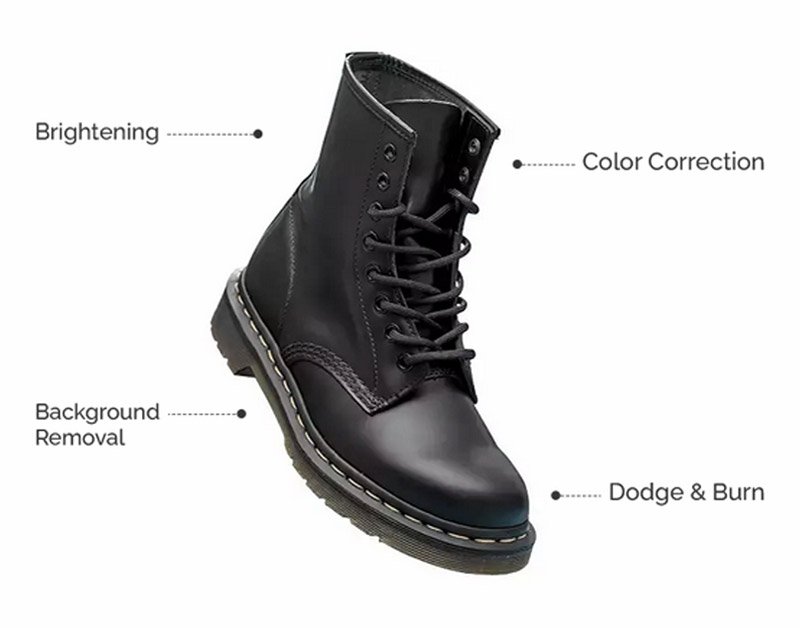
Our professional photo editing company provides all the latest photo editing services with perfection. Our highly qualified and experienced editors enhance the effectiveness of any photo by changing its background.
Simple Image
Simple Image
Simple Image
Simple Image
Clipping path is an advanced tool found in many photo editing software. It is a pen-like tool used to draw precisely around the object that we want to select and cut it out from its original background. It allows making many changes to the picture separated from its background. With the high quality precision tool, we can change the backdrop of any picture enhancing its look and appeal.


How We Work - 5 Simple Steps

Each and every one of our employees represent the spirit of our company: driven, committed, and acutely aware of how limitless Hanover’s potential is to grow.


STEP 1 - To claim a free trial, please use this form & send us some sample images along with editing instructions.
STEP 2 - Please put DropBox.com/Google Drive/WeTransfer.com link in the "Image Link:" field. Please don't send images in attachment on email.
STEP 3 - Please fill the form with the rest of the details (Name, Email....etc) and submit.
STEP 4 - We will process sample images (Min 2 - Max 10) with our price quote and send it to your email in the next 1-2 days.
STEP 5 - If you like our editing work and price quote we can go ahead further, if not Trial images are 100% Free for you.


Some of the popular vector graphic software include CorelDraw, Adobe Illustrator and Para Design Pro, which are widely used by photo editing services, image editing services, and retouching services professionals across multiple industries. These tools are essential for precision-based background removal, image enhancement, and photo retouching services used by photographers, marketing agencies, businesses, and the real estate business. Vector images are saved as Bezier curves, lines, and text instead of pixels, making them ideal for large-scale projects, outsourcing requirements, and cross-country delivery to clients in different countries. Due to scalability, colour accuracy, and cost efficiency, vector workflows help photo editors meet customer expectations while maintaining competitive price and service quality.
Many modern camera and computer photo editing services include automatic photo enhancement tools commonly used in Lightroom, filters, saturation control, and colour correction. These features help professionals quickly enhance images for clients, real estate projects, and marketing campaigns. Automatic tools adjust brightness, colour balance, sharpness, and remove red-eye with minimal effort, helping businesses reduce delivery time, project cost, and meet tight deadlines while maintaining consistent image quality.
RAW image files are large and require advanced image editing services for compression and optimisation. Digital compression helps photo editors manage storage, delivery speed, and outsourcing workflows without compromising client expectations. JPEG compression allows professionals to control file size based on industry requirements, pricing models, and final delivery standards agreed upon in project quotes.
Some compression algorithms, such as PNG, are lossless and preserve precision, colour depth, and image clarity, which is critical for real estate photo editing services, marketing visuals, and high-end retouching projects. JPEG, while lossy, reduces details invisible to the naked eye, making it suitable for fast delivery, online content, and cost-effective solutions demanded by global clients.
Listed below are some of the most used features in professional photo retouching services and image editing services. These tools are essential for photographers, businesses, and outsourcing companies handling diverse industries and large-scale projects.
One of the most basic yet powerful features is image selection, which allows professionals to apply retouching, colour correction, saturation, and filters to specific areas without affecting the entire image. Advanced selection tools ensure precision, attention to detail, and consistent quality across client projects.
The Marquee tool selects rectangular or polygonal regions, while the Lasso tool enables freehand selection for creative retouching tasks. The Magic Wand tool selects areas based on colour similarity and luminance, ideal for fast background removal. Pen tools, based on vector paths, are widely used by professionals for high-precision clipping paths and image enhancement services.
Advanced features such as edge detection, masking, alpha compositing, and channel-based extraction are heavily used in professional retouching services to meet complex client requirements. These tools help photo editors maintain industry standards while delivering consistent results across countries.
Layers are a core component of every photo editing service workflow. They allow professionals to manage multiple elements independently, ensuring flexibility, creativity, and non-destructive editing. This layered workflow is critical for businesses handling large outsourcing projects, real estate images, and marketing campaigns.
Image scaling and resizing allow professionals to optimise photos for different platforms, marketing channels, and client expectations. DSLR images are resized without losing quality using resampling techniques, ensuring fast delivery and cost efficiency for customers worldwide.
Image cropping improves composition and visual impact, which is especially important in real estate photo retouching services and marketing visuals. Background removal using selection tools requires expertise, commitment, and precision, especially when handling complex elements like hair, shadows, and fine edges.
Histograms help professionals control brightness, contrast, and colour balance accurately. This ensures consistent image enhancement across multiple projects and meets strict client expectations in industries such as real estate, e-commerce, and advertising.
Noise reduction tools remove dust, scratches, and artifacts while maintaining image clarity. Professionals must balance noise reduction carefully, as excessive use can reduce image detail and impact customer satisfaction.
The clone stamp tool is widely used in photo retouching services to remove unwanted objects and distractions. Colour replacement, rotation, flipping, and perspective correction are commonly used in marketing and real estate projects to improve visual appeal.
Distortion and perspective correction tools help correct architectural images in the real estate business. These tools require expertise, as improper use can reduce image quality and increase project cost.
Sharpening and blurring tools enhance subject focus and visual clarity. Portrait retouching often involves softening skin and backgrounds, while edge enhancement increases perceived sharpness. Professionals carefully balance contrast, saturation, and filters to avoid unnatural results.
Image compositing allows multiple images to be merged into a single file using clipping paths, alpha channels, and masking. These techniques are essential for advanced image editing services, marketing visuals, and creative content development.
Image slicing supports web design and interactive content creation, enabling businesses to reuse visual assets efficiently across platforms.
Special effects, textures, distortions, and creative filters allow professionals to deliver unique content aligned with client interests and branding goals. These effects are widely used in marketing, social media, and creative industries.
Colour depth adjustment, grayscale conversion, and tonal control help reduce file size and create artistic effects. Modern software enables smart exposure correction, gamma adjustment, and curves manipulation to enhance images taken in poor lighting conditions.
Colour correction tools allow professionals to fix white balance, saturation, and tonal shifts. Red-eye removal and advanced colour channel mixing improve image quality and customer satisfaction.
High Dynamic Range (HDR) techniques blend multiple exposures to create visually rich images, commonly used in real estate photography and commercial projects.
Understanding pixels per inch (PPI) is essential for printing and delivery. Image size tools help professionals ensure correct print dimensions, quality, and consistency across devices. Printer quality, image resolution, and PPI settings directly affect final output and client satisfaction.